In this tutorial we will show you how to setup a selection list with options that change dynamically based on option selected in another selection list . We will use the demo database for demonstration. The "cars", "trademarks" and "models" tables will be used in the example.
We'll generate Add or Edit page for the "cars" table, in the page two selection lists will be generated for the "Trademark" and "Model" fields using the "SELECT" Edit Tag. When the user choose a trademark in the trademark selection list, the options in the model selection list will be changed accordingly. Only models belonged to the selected trademark will be shown. We refer to the "Trademark" field as the parent field and the "Model" field as the child field.
Table "cars" having 2 fields named "Trademark" and "Model"
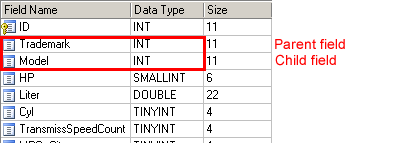
Table "trademarks" - Lookup Table for the parent field "Trademark" in "cars" table

Table "models" - Lookup Table for the child field "Model" in "cars" table
In this example, the "Models" table has an integer field named "Trademark" storing the trademark ID of the model.
Steps to Setup selection list with dynamic options
1. Open DB AppMaker
Open DB AppMaker and connect to the demo database.
2. Set up the selection lists
Click "cars" table on the Database pane.
Select field "Trademark" and click on SELECT on the Edit Tag Panel. Check Use Lookup Table checkbox on the Edit Tag panel and enter the following setting.
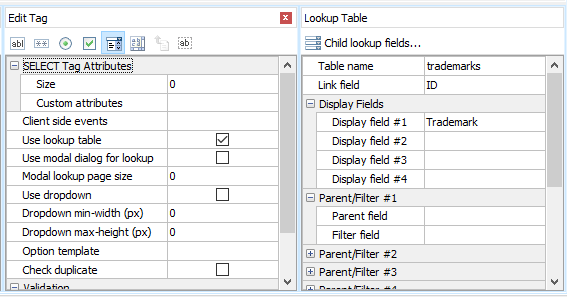
To set up child fields, click Child lookup fields... and enter the following settings:
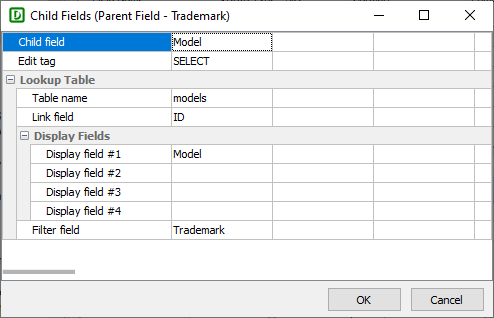
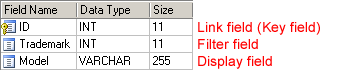
Link field is the field (in lookup table) whose value is actually saved. In this example, the field value of models.ID (NOT models.Model) will be saved to the field cars.Model.
Filter field is the field (in lookup table) by which the lookup table records are filtered. Only records with a Filter field value matching the selected value of the parent selection list will be shown. In this example, only models with Trademark field value matching the selected Trademark ID in the parent selection list are shown.
Click OK to confirm.
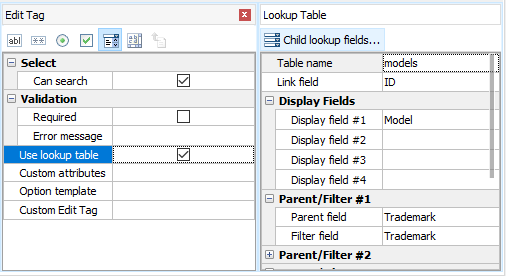
If you now select the Model field, you'll see:
3. Generate scripts
Click the Generate button to generate scripts.
4. Run the application
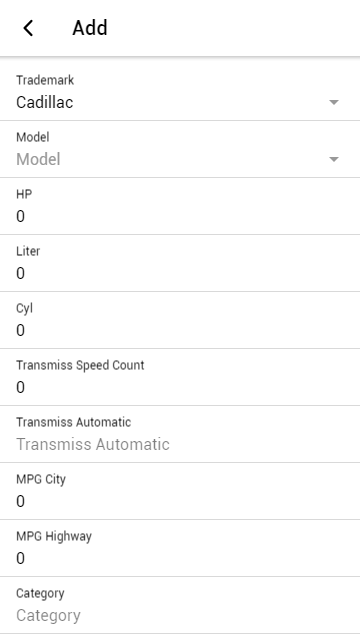
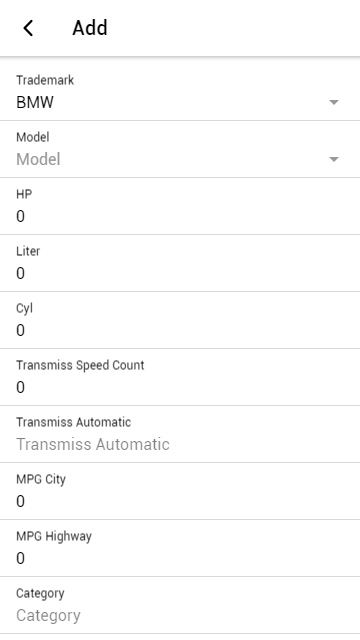
Run the app with ionic serve. Click on the link to the "cars" table and go to the Add page. The options in the model selection list will be changed automatically when the selected option in trademark selection list is changed.
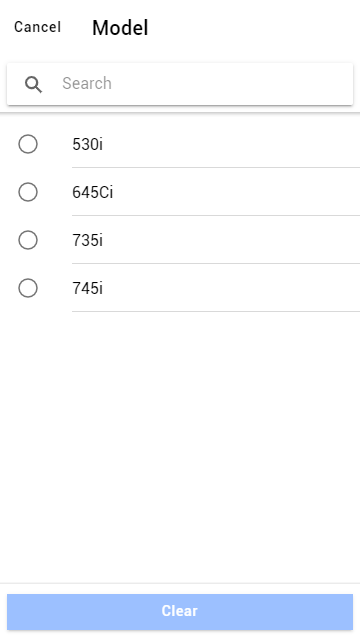
Set the trademark to "BMW", the models are:
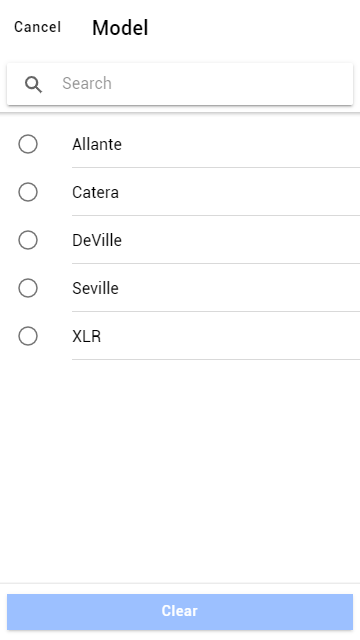
Change the Trademark to "Cadilllac", the models change accordingly: