Quick Start
IMPORTANT NOTE If you have not used DB AppMaker before, please read
Preparing Windows for Android App Development first and follow it to prepare your Windows for building and running apps.
You can NOT run any app without preparing your Windows properly first.
DB AppMaker connects to your database, extracts tables
and fields information, and generates and builds an app instantly based
on these information. For each selected table, it will generate a list page and view page all linked up
properly.
To generate and build your first app, you just need to follow the tabs one by one and setup the options:

In this tutorial, as a quick start, you can just skip the intermediate steps and use the default settings. In other words, you can go directly from the Database tab to the Generate tab after connecting to your data source:

If you do not have a database yet, you can download the demo project first. Unzip the archinve and follow the instructions in the readme.txt.
Then you generate and build the app as follows:
- Start up DB AppMaker and choose the database type, since the demo database is MySQL, choose data type as "MySQL", then enter your connection information:
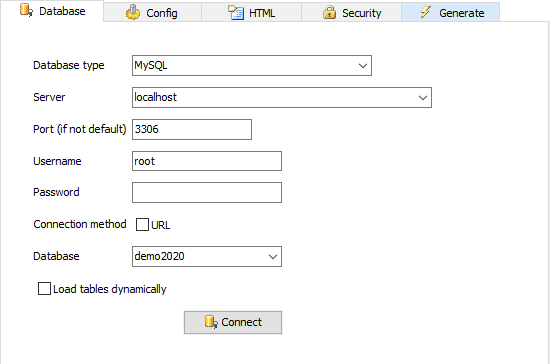
- Select the database, click the Connect button to load the database information.
Tables and fields information will be loaded and displayed in the Database pane on left.
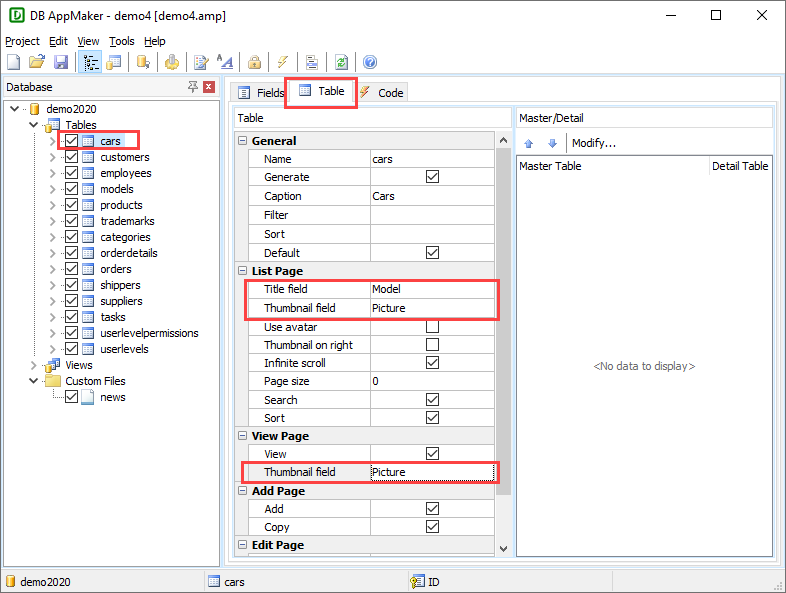
- Click "Tables" or "Views" in the Database pane, the table properties will be shown in the right panel, click the "cars" table in the Database pane, then click the Table tab on the right, set up the Title Field (e.g. Model) and the Thumbnail Field (e.g. Picture).
- Click the Generate tab and select the follows:
Template file - The zipped file that contains the template of the generated pages. Just use the default template shipped.
Project folder - The folder that the generated app will reside. It is recommended that you select a folder without permission concerns, e.g. D:\demo.
API URL (Development) - Make sure you have set up your web server and created a site for the API, then enter the URL of the site, e.g. http://192.168.0.1/api/. Usually this URL is local, but using IP address instead of "localhost" is recommended because when testing the app on your mobile device later, "localhost" is a wrong URL for the device.
Platform - Select "Android" for this example.
Ionic CLI Command - Select "serve".
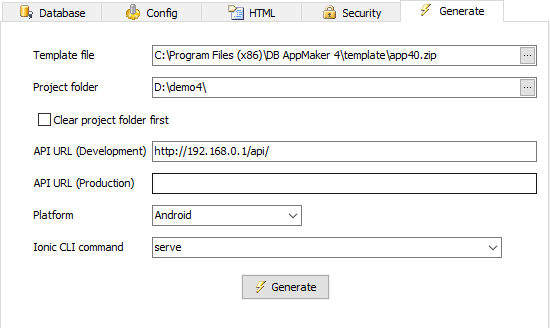
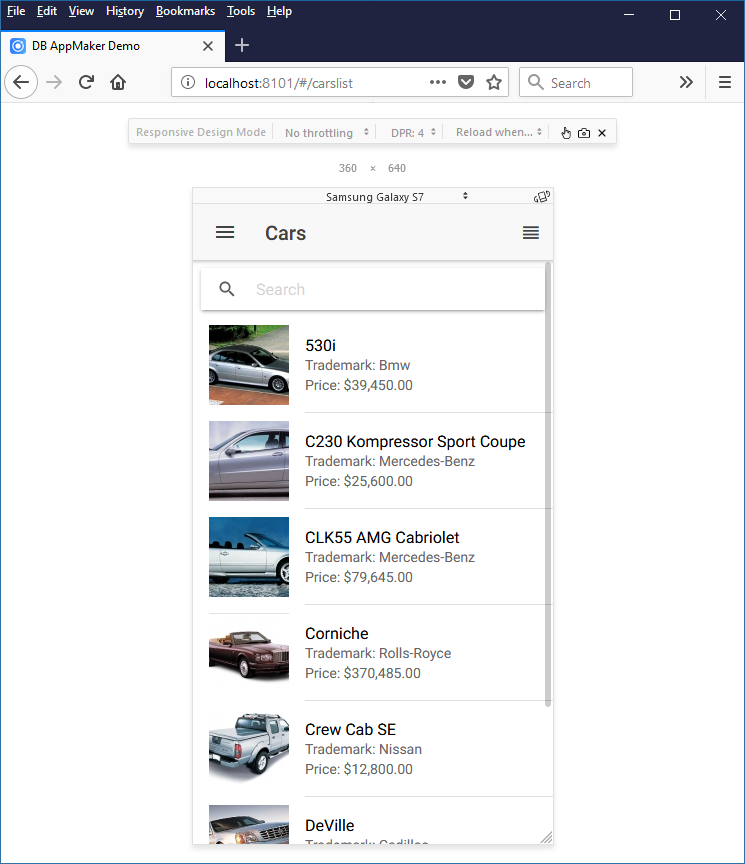
- Press the Generate button, the generation process
will begin. After the app is generated successfully, DB AppMaker will launch your app in browser.
- If you have installed Google USB driver and set up your phone, plug in your mobile device over USB and check if it can be detected first. (See Preparing Windows for Android App Development.) Change the Ionic CLI Command to "cordova run android", press the Generate button again. After generation, DB AppMaker will launch your app in your Android device.
After understanding how it works, you can then take advantages of various
other options provided by DB AppMaker and setup your project more precisely.
See Project Setup for full details.