
In this tutorial we will show you how to setup User ID Security. We will use the demo database for demonstration.
User ID
User ID Security secures data at record level. Protected tables must have
an User ID field for identifying which user a record belongs to. The User
ID field names can be different in tables though. When User ID security
is enabled, users can only access their own data.
The "employees" table and "orders" table in the demo will be used in this example.
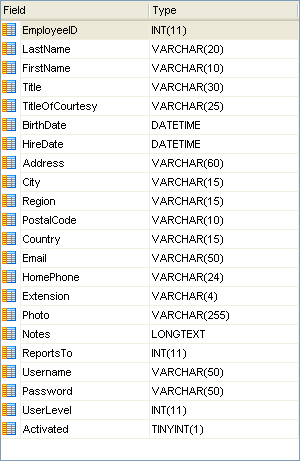
Fields in Table "employees"
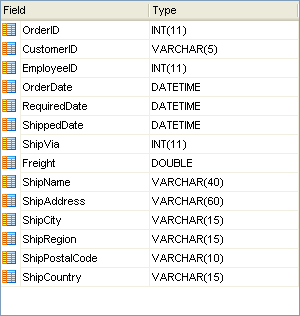
Fields in Table "orders"
Steps to Setup Advanced Security
1. Open DB AppMaker
Open DB AppMaker and connect to the demo database.
2. Set up Security
Click on the Security tab, there are two sections for the login process:
Administrator Login
If you enable this option, a hard-coded Administrator account will be generated
which has all access right to all tables/views.
Use Existing Table
Enable this option to set up the user access levels. You should select the
security table and the corresponding User Name and Password fields.
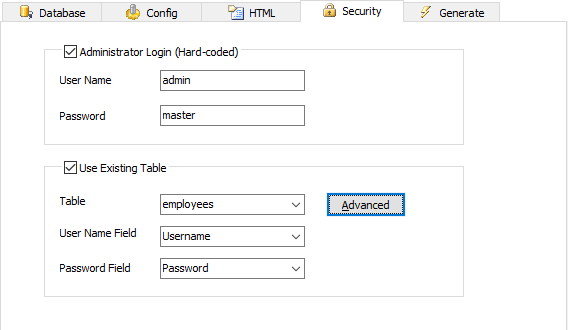
To set up the user ID, click on the Advanced button. A popup window will appear.
3. Set up User ID Security
You can set up the User ID Field and Parent User ID as follow:
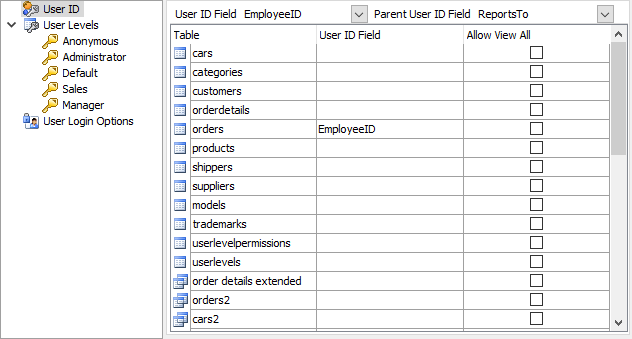
As the caption suggests, the User ID Field is a field to identify users. The field values for each user must be unique. So typically the primary key of the User Table is used as User ID Field.
To identify the records owned by a user, the records must also have a field to store the User ID value. Therefore, all protected tables must have an User ID field, the field names can be different though. To setup User ID field for each table,
Parent User ID field stores the parent User ID that the user belongs to. For example, a parent user can be the manager that the employee reports to. You can select an Parent User ID for users so the parent user can modify the child users' records as his/her own. (otherwise the feature is disabled)
In this example, we set the Parent User ID Field as the "ReportsTo" field.
4. Generate scripts
Go to the Generate tab, click the Generate button to generate scripts.
5. Run the application
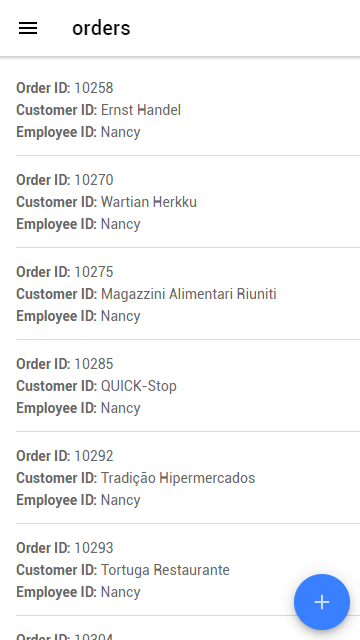
Run the app with ionic serve. Login as employee #1 using "nancy" and user name and "1234" as password. Go to the "orders" table. As we have used User ID security for the table,
we can only see employee #1 (nancy)'s records.
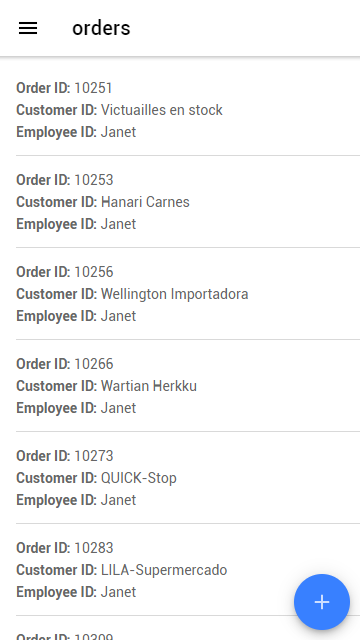
If you now log out and login again as employee #3 using "janet" as user name and "1234" as password, you can only see employee #3 (janet)'s records:
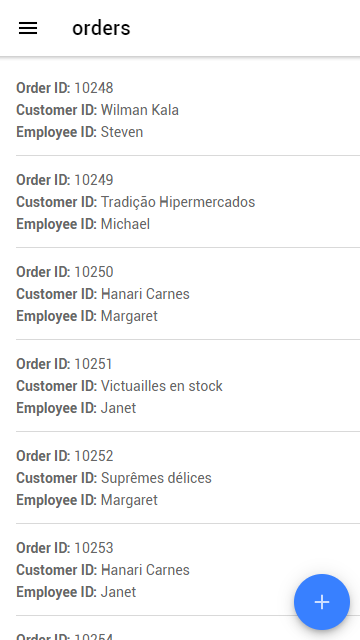
But if you now logout and login again as employee #2 using "andrew" as user name and "1234" as password, you can see employee #1(nancy), #3 (janet), #4(margaret), #5(steven) and #8(laura)'s records because "andrew" is the parent user of them, all these users report to "andrew".
Notes
Also See
Advanced Security - Static User Level Security
Advanced Security - Dynamic User Level Security